

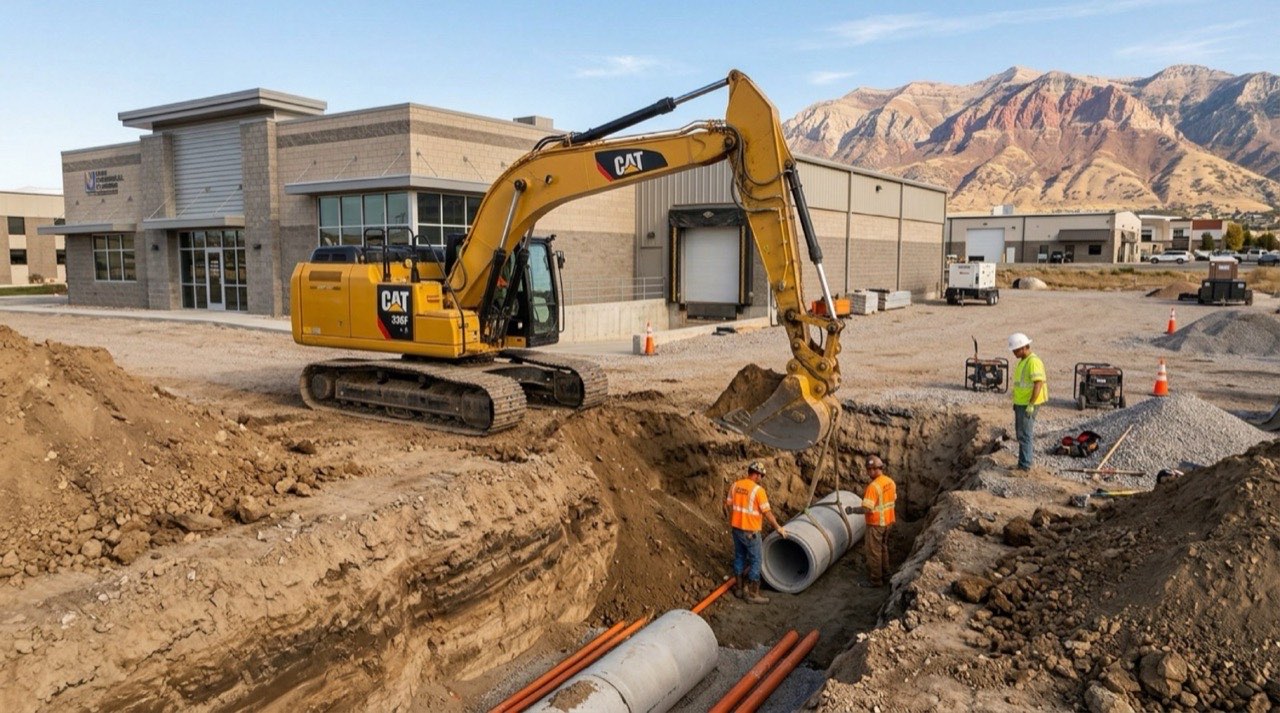
When a plumbing problem is underground, there is no fixing it from above. Collapsed sewer lines, broken water mains, severely deteriorated pipes, and failed utility connections all require direct access to the pipe itself, and that means planned digging. A plumbing excavation service is the process of opening the ground in a controlled, staged way to reach buried plumbing that cannot be repaired or replaced from the surface. It is not a last resort; for many underground pipe failures, it is simply the most reliable path to a lasting fix.
Understanding what the process involves helps property owners know what to expect before, during, and after the work.
What Plumbing Excavation Covers
Plumbing excavation is the controlled digging required to expose underground pipes, fittings, valves, cleanouts, and utility connections that sit below the surface. The scope depends on the problem and its location.
Common Applications
Excavation is used across a range of underground plumbing situations:
- Sewer laterals connecting a property to the municipal main
- Main water service lines running from the street to the building
- Drain lines, storm drainage, and below-grade connections
- New plumbing installations and utility tie-ins
- Replacement of pipe sections that have deteriorated beyond trenchless repair
Types of Excavation Work
Not every underground problem requires opening the full pipe route. The approach depends on the extent of the damage:
- Spot repair: Targeted excavation of one damaged section, leaving the surrounding pipe in place
- Full replacement: Excavation along most or all of the pipe run when the condition is widespread
- Trenchless repair: An alternative where conditions allow access through smaller entry and exit points rather than an open trench
A camera inspection or leak-locating assessment confirms the right approach before any digging begins.
Step 1: Diagnosis and Location
Before a single shovel enters the ground, the crew needs to know exactly where the problem is and how deep the pipe sits.
Sewer and Drain Diagnosis
A camera is run through the line to identify the location and nature of the damage, whether that is a break, an offset joint, root intrusion, or pipe collapse. Pipe-locating equipment then traces the camera transmitter above ground to mark the repair zone on the surface.
Water Line Diagnosis
Finding a water line leak underground involves a combination of tools:
- Pressure testing and meter checks
- Acoustic leak detection equipment
- Review of utility records and property diagrams
Together, these narrow the location before any digging starts.
Site Review
The crew also reviews the full site before finalizing the plan. Property layout, existing landscaping and paving, building proximity, access routes, soil type, drainage patterns, and pipe depth all shape the excavation approach and help minimize disturbance to the surrounding area.
Step 2: Utility Locates and Permits
Opening the ground without knowing what else is buried there is how costly damage happens. This step happens before any equipment moves.
In the United States, contractors notify the local utility-locate service by calling 811 before digging. Public utility crews then mark the approximate locations of power, gas, water, communications, and other lines they own. However, private utilities are not always covered by the public locate. These include:
- Irrigation systems and landscape lighting
- Private gas lines and septic systems
- Some sewer and water laterals on private property
A reputable contractor identifies what additional locating may be needed based on the site before work begins.
Permits and Inspections
Many jurisdictions require permits for sewer lateral repair, water service replacement, work within the public right-of-way, or street cuts. The contractor confirms which permits apply, who is responsible for obtaining them, and when inspections are required. Requirements vary by location, utility ownership, and the nature of the work.
Step 3: Site Preparation
With the problem located and approvals in place, the site is prepared before excavation begins. The work zone is marked, and equipment access is established.
Key preparation steps include:
- Identifying and protecting nearby structures, driveways, trees, fencing, and irrigation lines
- Setting up traffic control, pedestrian routes, barriers, and signage where the work is on or near a public area
- Confirming staging areas for excavated soil, replacement materials, and equipment
- Photographing the existing site conditions to establish a baseline for restoration
None of this is optional. A well-prepared site reduces the risk of property damage and delays once digging starts.
Step 4: Excavation
With the site prepared, the actual digging begins. The method depends on conditions, access, and what is buried nearby.
Mechanical Excavation
Mini excavators, backhoes, or larger equipment are used for accessible outdoor projects. The crew excavates in controlled stages, slowing the approach as they get close to the pipe or any marked utilities.
Hand Digging
Once the crew enters the tolerance zone around marked utilities, hand tools replace mechanical equipment. This reduces the risk of striking a buried line with a machine bucket and is standard practice near any flagged utility.
Hydrovacuum Excavation
Some situations call for hydrovacuum excavation, which uses pressurized water to break up the soil and a vacuum system to remove the slurry. This method provides more precise exposure around congested or sensitive utilities where conventional digging carries higher risk.
Trench Safety
Trench walls can collapse, particularly in wet or unstable soil. Professional crews use protective systems appropriate to the depth, soil, and site:
- Sloping the trench walls back at a safe angle
- Shoring the walls with timber or hydraulic supports
- Using a steel trench box to protect workers inside the excavation
No one works in an unprotected trench, regardless of depth.
Step 5: Pipe Repair or Replacement
With the pipe exposed, the crew confirms the diagnosis and repairs. The damaged section is removed along with any failed fittings, roots, or compromised connections. Replacement pipe is installed to the correct specifications:
- The right pipe material and diameter for the application
- Proper fittings, cleanouts, and valves
- Correct slope for sewer lines to drain by gravity
- Adequate burial depth and freeze protection for water lines where the climate requires it
The repair is not simply to get the line flowing again, as it is carried out to match local code and the approved design.
Step 6: Testing Before Backfill
Closing the trench before the new plumbing has been verified is one of the costlier mistakes a project can make. Testing happens while the trench is still open. A flow test, camera inspection, or other locally required test confirms proper slope, clean connections, and no obstructions in the new or repaired line.
Water Line Testing
- Pressure test and leak test to confirm connection integrity
- Flushing and disinfection where required
- Confirmation that all valves and service connections operate correctly
Inspection Sign-Off
Where a municipal or utility inspection is required before backfill, it is scheduled and completed at this stage. The inspection sign-off is the green light to close the trench. Skipping this step and backfilling early can turn a minor correction into a full re-excavation.
Step 7: Backfill, Compaction, and Restoration
With testing complete and inspections signed off, the trench is closed, and the surface is restored. Approved bedding material is placed around the pipe first to protect it. The trench is then backfilled in lifts and compacted at each stage to reduce settlement. Surface restoration follows based on what was disturbed:
- Soil grading and seeding or sod replacement
- Gravel, asphalt, concrete, or paver restoration
- Fencing, irrigation, and landscaping repairs
The timing and extent of surface restoration may depend on weather, settlement periods, material availability, or permit conditions. These factors are confirmed before the project closes out.
How Long Does Plumbing Excavation Take?
Timeline varies depending on scope, site conditions, and permit requirements. A straightforward spot repair on an accessible residential line may be completed in a day or two. A full sewer or water line replacement involving deep pipe, difficult soil, permit inspections, or street work can take several days to a couple of weeks.
The realistic sequence to plan around:
- Diagnosis and assessment
- Utility locates and permit applications
- Site preparation
- Excavation and repair
- Testing and inspection
- Backfill and compaction
- Surface restoration
Each phase has its own variables, and a firm timeline is best confirmed once site conditions and permit requirements are fully known.
FAQs
What is plumbing excavation?
Plumbing excavation is the planned digging required to expose and access underground pipes that cannot be repaired, replaced, or installed from the surface. It is used for collapsed sewer lines, broken water mains, and new utility connections.
How do plumbers know where to dig?
Camera inspections locate sewer and drain problems by transmitting a signal that the crew tracks above ground. Water line leaks are found using pressure testing, acoustic detection tools, and utility records. Utility locating services mark other buried lines before digging begins.
Is plumbing excavation always necessary for sewer line repair?
Not always. Trenchless methods such as pipe lining or pipe bursting can address some sewer problems without a full open trench. When the pipe is collapsed, severely offset, or in a condition that trenchless methods cannot correct, a plumbing excavation service is the appropriate approach.
Final Thoughts
Underground plumbing problems do not resolve on their own, and the longer a collapsed or broken line goes unaddressed, the more damage it causes to the surrounding soil, structure, and utility connections. Understanding the excavation process helps property owners make informed decisions and set realistic expectations for the work ahead.
BFMD Plumbing, LLC has handled plumbing excavation service work across the Baltimore Metro Area since 2007. The crews manage the full process from camera inspection and utility locating through excavation, repair, testing, and site restoration. Upfront pricing with no hidden charges and emergency availability seven days a week.
Call (410) 440-5814 or visit the website to schedule a site assessment.